
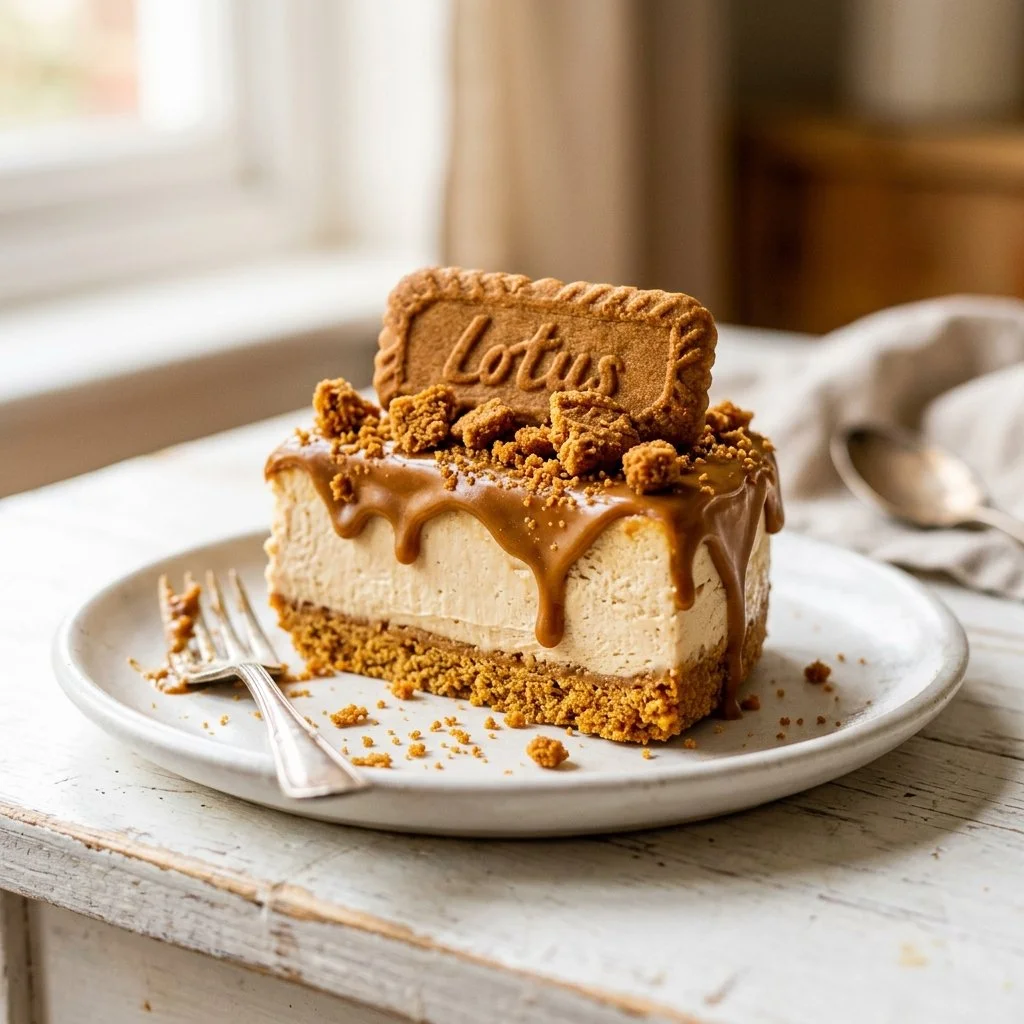
No Bake Lotus Biscoff Cheesecake is an indulgent dessert that combines the unique flavors of Lotus Biscoff cookies and a creamy, rich cheesecake filling. Perfect for any occasion, this no-bake cheesecake requires minimal effort and delivers maximum flavor, making it an instant crowd-pleaser. Just imagine a dessert that’s cool, creamy, and has a delightful caramel-like taste, all topped with swirls of Lotus Biscoff spread. Let’s dive into making this easy and delightful treat!
Recipe Information
- Prep Time: 30 minutes
- Cook Time: 0 minutes
- Total Time: 4 hours 30 minutes
- Servings: 10
- Difficulty Level: Easy
Nutrition Information
- Calories per serving: 420
- Protein: 6g
- Carbohydrates: 38g
- Fat: 30g
- Fiber: 1g
- Sugar: 22g
- Sodium: 210mg
Why Make This No Bake Lotus Biscoff Cheesecake
This No Bake Lotus Biscoff Cheesecake is not only simple to make but also incredibly delicious. The creamy filling contrasts beautifully with the crunchy, buttery cookie crust. It’s a dessert that works wonderfully for everything from holiday gatherings to casual weeknight treats. Plus, the fact that it doesn’t require baking makes it a perfect recipe for warm days or when you’re short on time.
How to Make No Bake Lotus Biscoff Cheesecake
Get ready to impress your family and friends with a dessert that looks as fabulous as it tastes. This no-bake cheesecake is sure to become a staple recipe in your kitchen. Just follow these easy steps to bring it to life.
Ingredients:
- 250g Lotus Biscoff cookies
- 100g butter, melted
- 600g cream cheese
- 250ml heavy cream
- 100g powdered sugar
- 1 tsp vanilla extract
- Lotus Biscoff spread for topping
Directions:
-
Step 1: Preparation
Crush the Lotus Biscoff cookies into fine crumbs and mix them with the melted butter. Press the mixture firmly into the base of a springform pan to create an even crust. Pop it in the fridge for about 30 minutes to set.
-
Step 2: Mixing
In a large mixing bowl, beat the cream cheese, powdered sugar, and vanilla extract together until you get a smooth and creamy consistency.
-
Step 3: Whipping
In another bowl, whip the heavy cream until soft peaks form. Gently fold the whipped cream into the cream cheese mixture, being careful not to deflate the fluffy texture.
-
Step 4: Assembling
Pour the creamy filling over the chilled cookie crust. Smooth out the top with a spatula for a beautiful finish.
-
Step 5: Topping
Drizzle generous swirls of Lotus Biscoff spread on top of the cheesecake filling and use a knife or spatula to create a marbled design.
-
Step 6: Chilling
Cover the cheesecake with plastic wrap and refrigerate for at least 4 hours, or until it’s nice and set.
-
Step 7: Serving
Once set, gently release the cheesecake from the springform pan. Slice into generous pieces and serve chilled. Enjoy every creamy, dreamy bite!
How to Serve No Bake Lotus Biscoff Cheesecake
This cheesecake is perfect on its own but pairs wonderfully with a cup of coffee or tea. For a festive touch, serve it with fresh berries or a dollop of whipped cream. You can also sprinkle some crushed Lotus Biscoff cookies on top for added texture and flavor.
How to Store No Bake Lotus Biscoff Cheesecake
Store any leftovers in an airtight container in the fridge. It will keep well for up to 3 days. This cheesecake can also be made a day in advance, allowing the flavors to meld beautifully overnight!
Expert Tips for Perfect No Bake Lotus Biscoff Cheesecake
- For best results, ensure your cream cheese is at room temperature before mixing to avoid lumps.
- If you prefer a sweeter cheesecake, adjust the powdered sugar to taste.
- Keep the heavy cream cold while whipping for best results – chilled utensils also help!
- Consider adding a splash of lemon juice for a subtly tangy twist to balance the sweetness.
Delicious Variations
- Chocolate Biscoff Cheesecake: Add cocoa powder to the cheesecake filling for a chocolate twist.
- Fruit Topping: Top the cheesecake with fresh fruits like strawberries or raspberries for a refreshing touch.
- Nutty Crunch: Mix chopped nuts into the crust for an added crunch and flavor.
Frequently Asked Questions
-
Can I use other cookies for the crust?
Yes! If you can’t find Lotus Biscoff cookies, any buttery cookie like Digestives or graham crackers works well. -
How can I make this recipe gluten-free?
Use gluten-free cookies to make the crust, and ensure all other ingredients are certified gluten-free. -
Can I freeze this cheesecake?
Yes, you can freeze it for up to 2 months. Just make sure to wrap it tightly with plastic wrap and aluminum foil. -
What can I use instead of heavy cream?
You can use whipped coconut cream as a dairy-free alternative, though the texture may vary slightly. -
How do I prevent the cheesecake from cracking?
Make sure to chill it completely before slicing, as a warm cheesecake might crack when cooled rapidly.
Conclusion
With its luscious texture, delightful flavor, and the ease of preparation, this No Bake Lotus Biscoff Cheesecake is sure to win over hearts and taste buds alike. It’s a versatile dessert that can be adjusted to suit any occasion or preference. So gather your ingredients, follow the steps, and enjoy creating this irresistible treat that everyone will love! Happy baking (or rather, chilling)!
Print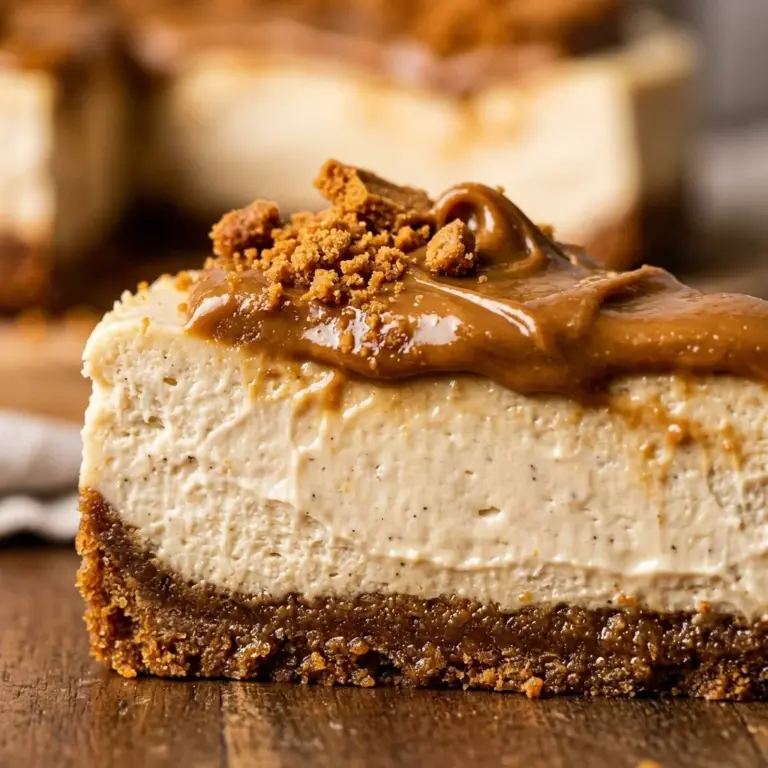
No Bake Lotus Biscoff Cheesecake
An indulgent no-bake cheesecake with Lotus Biscoff flavors, perfect for any occasion.
- Total Time: 270 minutes
- Yield: 10 servings 1x
Ingredients
- 250g Lotus Biscoff cookies
- 100g butter, melted
- 600g cream cheese
- 250ml heavy cream
- 100g powdered sugar
- 1 tsp vanilla extract
- Lotus Biscoff spread for topping
Instructions
- Crush the Lotus Biscoff cookies into fine crumbs and mix them with the melted butter. Press the mixture firmly into the base of a springform pan to create an even crust. Pop it in the fridge for about 30 minutes to set.
- In a large mixing bowl, beat the cream cheese, powdered sugar, and vanilla extract together until you get a smooth and creamy consistency.
- In another bowl, whip the heavy cream until soft peaks form. Gently fold the whipped cream into the cream cheese mixture, being careful not to deflate the fluffy texture.
- Pour the creamy filling over the chilled cookie crust. Smooth out the top with a spatula for a beautiful finish.
- Drizzle generous swirls of Lotus Biscoff spread on top of the cheesecake filling and use a knife or spatula to create a marbled design.
- Cover the cheesecake with plastic wrap and refrigerate for at least 4 hours, or until it’s nice and set.
- Once set, gently release the cheesecake from the springform pan. Slice into generous pieces and serve chilled. Enjoy every creamy, dreamy bite!
Notes
Store leftovers in an airtight container in the fridge for up to 3 days. This cheesecake can be made a day in advance for better flavor melding.
- Prep Time: 30 minutes
- Cook Time: 0 minutes
- Category: Dessert
- Method: Chilling
- Cuisine: Dessert
- Diet: Vegetarian
Nutrition
- Serving Size: 1 serving
- Calories: 420
- Sugar: 22g
- Sodium: 210mg
- Fat: 30g
- Saturated Fat: 15g
- Unsaturated Fat: 10g
- Trans Fat: 0g
- Carbohydrates: 38g
- Fiber: 1g
- Protein: 6g
- Cholesterol: 90mg